Creamy Garlic Parmesan Chicken With Cheesy Twisted Pasta

🧀 Creamy Garlic Parmesan Chicken With Cheesy Twisted Pasta 🍝🧄
Restaurant-quality comfort in just 30 minutes! Golden sautéed chicken nestled in a luscious three-cheese sauce that wraps around every spiral of pasta for the ultimate weeknight indulgence that even picky eaters request seconds of!
Ingredients:
  • 1½ pounds boneless skinless chicken breasts, cut into strips
  • 2 tablespoons olive oil
  • 1 tablespoon Italian seasoning
  • 1 teaspoon salt
  • ½ teaspoon freshly ground black pepper
  • 12 oz twisted pasta (rotini or fusilli)
  • 2 tablespoons butter
  • 4 garlic cloves, minced
  • ¼ teaspoon red pepper flakes (optional)
  • 1 cup heavy cream
  • ½ cup chicken broth
  • 1 cup parmesan cheese, freshly grated
  • 4 oz cream cheese, softened and cubed
  • 1 cup mozzarella cheese, shredded
  • 2 tablespoons fresh parsley, chopped
  • ½ cup reserved pasta cooking water

Read more

Come fare fiorire un albero di Giada e profumare tutta casa

The Jade tree is perfect for decorating gardens and interior spaces, not only for its wonderful leaves, but also because it is associated with good luck. In this article we explain how to make a Jade tree bloom.

Easy to reproduce and maintain, the Jade tree is a very popular and widespread plant. Yet few people know that it can bloom and generate wonderful and very fragrant flowers, star-shaped, white with purple touches.

The flowers of the Jade tree appear on the tips of the branches, in the shape of bunches, generally at the end of winter and at the beginning of spring.

In order for it to bloom, the Jade tree must not be very young. On average, a plant can take up to 10 years before it begins to

Read more

Saucy Beef and Vegetable Casserole

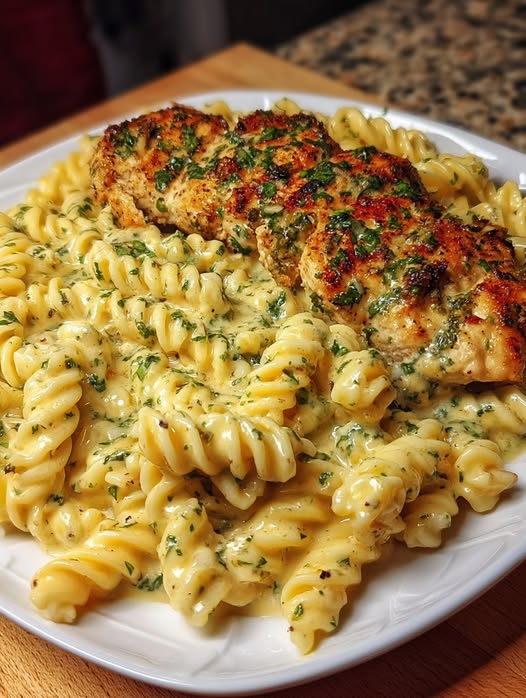
The Saucy Secret: Unlocking the Timeless Magic of Beef and Vegetable Casserole

Imagine this: a chilly evening descends, painting the world in hues of grey and blue. From your kitchen, a symphony of rich, savory aromas begins to unfurl, a promise of warmth and comfort to come. That unmistakable scent, deep and inviting, can only mean one thing: a magnificent saucy beef and vegetable casserole is bubbling gently, patiently transforming humble ingredients into something truly extraordinary. It’s more than just a meal; it’s a culinary hug, a beacon of home, and an unspoken invitation to slow down and savor the simple pleasures.

For generations, the casserole has held a revered place in kitchens across the globe, serving as the ultimate canvas for hearty ingredients and tender, slow-cooked goodness. But what elevates a mere collection of ingredients baked in a dish into a legendary, soul-satisfying experience? The answer, as you’re about to discover, lies in its sauciness – that luscious, flavorful embrace that binds every component into perfect harmony. Prepare to embark on a journey that will transform your understanding of this classic dish, making every future casserole a masterpiece.

The Heart of Home: Why Casseroles Reign Supreme
There’s an undeniable allure to a casserole, a psychological warmth that goes far beyond its temperature. It’s the quintessential comfort food, a dish that whispers of grandmothers’ kitchens, family gatherings, and the uncomplicated joy of shared meals. This deep-seated affection isn’t accidental; it’s rooted in centuries of culinary evolution, from ancient stews bubbling over open fires to the modern oven-baked marvels we cherish today.

The concept of combining various ingredients in a single pot or dish for slow cooking is as old as civilization itself, a testament to efficiency and flavor development. What began as a practical method for making tough cuts of meat palatable and stretching ingredients has evolved into a celebrated culinary art form. The modern casserole, particularly one featuring succulent beef and vibrant vegetables swimming in a rich sauce, stands as a testament to this enduring legacy, promising both ease and unparalleled deliciousness.

A Culinary Hug: The Emotional Resonance of a Casserole
Have you ever noticed how certain foods have the power to transport you back in time, to evoke vivid memories and feelings of profound comfort? The saucy beef and vegetable casserole is one such dish. Its very nature—warm, hearty, and often prepared with love—taps into our primal need for sustenance and security. It’s the culinary equivalent of wrapping yourself in a soft, familiar blanket on a cold day, offering solace and satisfaction with every bite.

Read more

Find out how to use toothpaste to clean your floor and make your tiles shine.

Sure! Here’s an engaging article about using toothpaste to clean floors and make tiles shine:

Discover the Surprising Way Toothpaste Can Make Your Floor and Tiles Shine

When you think of toothpaste, your mind probably jumps straight to dental hygiene. But did you know this common bathroom staple can do wonders beyond cleaning your teeth? Yes, toothpaste can actually be a handy, budget-friendly cleaning agent for your floors and tiles — and it can make them gleam like new!

Why Toothpaste?

Toothpaste contains mild abrasives and cleaning agents designed to scrub away stains gently without damaging delicate surfaces. These qualities make it perfect for tackling stubborn grime and dullness on tile surfaces and even some types of flooring.

How to Use Toothpaste to Clean Floors and Tiles

Materials Needed:

  • White, non-gel toothpaste (avoid colored or gel types)
  • Soft cloth or sponge
  • Warm water
  • Soft-bristled brush (optional)
  • Clean dry towel

Step-by-Step Guide:

  1. Prepare the Area: Sweep or vacuum your floor or tiles to remove any loose dirt and debris.
  2. Apply Toothpaste: Squeeze a small amount of white toothpaste directly onto the stained or dull areas of your tiles or floor.
  3. Scrub Gently: Using a soft cloth, sponge, or soft-bristled brush, gently scrub the toothpaste into the surface in circular motions. The mild abrasives in the toothpaste help lift stains without scratching.
  4. Let it Sit: Allow the toothpaste to sit for 5 to 10 minutes to work on the grime.
  5. Rinse Thoroughly: Use a clean cloth dampened with warm water to wipe away all toothpaste residue.
  6. Dry and Buff: Dry the surface with a clean towel and buff lightly to bring out a natural shine.

Read more

Chicken Fillet in Spicy Garlic Parmesan Sauce

This Chicken Fillet in Spicy Garlic Parmesan Sauce is a flavorful and creamy dish with a kick of spice, balanced by the rich, cheesy goodness of Parmesan. Perfect for weeknight dinners or when you want a restaurant-quality meal at home!

Ingredients
(Serves 4)

For the Chicken:
4 boneless, skinless chicken fillets
1 teaspoon garlic powder
½ teaspoon smoked paprika
½ teaspoon cayenne pepper (adjust for spice level)
Salt and black pepper, to taste
2 tablespoons olive oil
For the Sauce:
3 tablespoons unsalted butter
4 garlic cloves, minced
1 cup (240ml) heavy cream (or half-and-half for a lighter option)
1 teaspoon red pepper flakes (adjust for spice level)
¾ cup (75g) grated Parmesan cheese
½ teaspoon Italian seasoning
Salt and black pepper, to taste
2 tablespoons fresh parsley, chopped (for garnish)
Juice of ½ a lemon (optional, for brightness)
Instructions

Read more

Vinegar makes hydrangeas bloom and bluer? 13 best garden hacks most don’t know

Gardening is both an art and a science, requiring a blend of creativity and knowledge to cultivate a thriving garden. While many gardeners rely on traditional methods, there are numerous unconventional hacks that can enhance plant growth, improve soil health, and even change the color of your flowers. These lesser-known tips can transform your garden into a lush paradise without the need for expensive chemicals or tools.

One such intriguing hack involves using vinegar to alter the color of hydrangeas. This simple household item can make your hydrangeas bloom more vibrantly and even change their color to a deeper blue. But vinegar is just the beginning. In this article, we will explore 13 of the best garden hacks that most people don’t know, each with the potential to revolutionize your gardening experience.

1. The Science Behind Vinegar and Hydrangea Color

Hydrangeas are unique among flowering plants because their bloom color can change based on the pH level of the soil. In acidic soils (pH below 6), hydrangeas tend to produce blue flowers, while in alkaline soils (pH above 7), they produce pink flowers. Vinegar, being acidic, can lower the pH of the soil when applied correctly.
To achieve bluer hydrangeas, gardeners can mix one cup of white vinegar with a gallon of water and apply it to the soil around the hydrangea plants. This should be done once every two weeks during the growing season. The acetic acid in vinegar helps to increase the acidity of the soil, which in turn enhances the blue pigmentation in hydrangea blooms.

2. How to Use Vinegar for Bluer Hydrangeas

To use vinegar effectively for bluer hydrangeas, start by testing your soil’s pH level with a home testing kit. If your soil is too alkaline, prepare a vinegar solution by mixing one cup of white vinegar with a gallon of water. Water your hydrangeas with this solution every two weeks, taking care to avoid the leaves and flowers to prevent any potential damage.
It’s important to monitor the soil’s pH regularly, as over-acidifying can harm the plant. Aim for a pH level between 5.2 and 5.5 for the best blue blooms. Additionally, ensure your hydrangeas are well-watered and receive adequate sunlight, as these factors also influence flower color and health.

3. Coffee Grounds for Acid-Loving Plants

Coffee grounds are an excellent addition to the garden, especially for acid-loving plants like azaleas, rhododendrons, and blueberries. They are slightly acidic and rich in nitrogen, making them a great natural fertilizer.
To use coffee grounds, simply sprinkle them around the base of your plants or mix them into the soil. You can also add them to your compost pile to enrich the compost with nitrogen. Be cautious not to overdo it, as too many coffee grounds can create a dense layer that prevents water from penetrating the soil.

Read more

Chicken Cordon Bleu

Ingredients:

For the Chicken Cordon Bleu:
* 4 boneless, skinless chicken breast halves
* 1/2 teaspoon salt
* 1/4 teaspoon freshly ground black pepper
* 6 slices Swiss cheese (or Gruyère, if preferred)
* 4 slices deli ham
* 1/2 cup seasoned bread crumbs
* 1 egg, beaten
* 1 tablespoon butter

For the Sauce:
* 1 can cream of chicken soup
* 1/2 cup sour cream
* 1 tablespoon lemon juice

Garnish Options:
* Chopped fresh parsley
* Lemon wedges
* Chopped chives
* Grated Parmesan
* Microgreens

Read more

3 homemade tips for removing grease that sticks to the burners in the kitchen

Kitchen burners, also known as pans or burners, are one of the most complicated areas to clean in the home routine and that’s because they usually collect food scraps, oil splashes, and more.

If it’s a nightmare for you to remove the grease stuck to the burners, you don’t need to worry anymore. In today’s article, we are going to give you the best simple and cheap tricks so that you can get rid of it and enjoy a super clean kitchen.

For these tricks, you’ll need ingredients that are easy to find and that you can even have in the comfort of your own home. Keep in mind that these homemade tricks will save you a lot of money and you won’t have to spend a fortune on chemicals that can harm the environment or your health.

1- With baking soda

Baking soda is an excellent ally in cleaning because it disinfects, degreases, neutralizes and bleaches. All of these features will be great for your burners to keep them shiny and ready to go.

What do I need?

  • 1/2 cup baking soda
  • boiling water
  • Spoon
  • Sponge
  • Towel

Step by step:

  1. The first thing you should do is wipe a damp cloth with water to remove any particles or superficial residue left on the burners.
  2. Once you’ve done that, you’ll want to place the baking soda on and around the burners, covering any difficult areas you want to clean with the spoon or, if you like, your hands.
  3. Once you’ve done that, you’ll need to pour boiling water over the entire area
  4. And then you need to leave this mixture of baking soda and water on for at least 30 minutes
  5. After this time has passed, you need to rub with the sponge and remove the water and the remains of the baking soda until there is nothing left. This will remove grease and any residue that may be in it.
  6. Lastly, you can wipe the surface with the damp cloth and your burners will be as clean as possible

Read more