Vinegar makes hydrangeas bloom and bluer? 13 best garden hacks most don’t know

Gardening is both an art and a science, requiring a blend of creativity and knowledge to cultivate a thriving garden. While many gardeners rely on traditional methods, there are numerous unconventional hacks that can enhance plant growth, improve soil health, and even change the color of your flowers. These lesser-known tips can transform your garden into a lush paradise without the need for expensive chemicals or tools.

One such intriguing hack involves using vinegar to alter the color of hydrangeas. This simple household item can make your hydrangeas bloom more vibrantly and even change their color to a deeper blue. But vinegar is just the beginning. In this article, we will explore 13 of the best garden hacks that most people don’t know, each with the potential to revolutionize your gardening experience.

1. The Science Behind Vinegar and Hydrangea Color

Hydrangeas are unique among flowering plants because their bloom color can change based on the pH level of the soil. In acidic soils (pH below 6), hydrangeas tend to produce blue flowers, while in alkaline soils (pH above 7), they produce pink flowers. Vinegar, being acidic, can lower the pH of the soil when applied correctly.
To achieve bluer hydrangeas, gardeners can mix one cup of white vinegar with a gallon of water and apply it to the soil around the hydrangea plants. This should be done once every two weeks during the growing season. The acetic acid in vinegar helps to increase the acidity of the soil, which in turn enhances the blue pigmentation in hydrangea blooms.

2. How to Use Vinegar for Bluer Hydrangeas

To use vinegar effectively for bluer hydrangeas, start by testing your soil’s pH level with a home testing kit. If your soil is too alkaline, prepare a vinegar solution by mixing one cup of white vinegar with a gallon of water. Water your hydrangeas with this solution every two weeks, taking care to avoid the leaves and flowers to prevent any potential damage.
It’s important to monitor the soil’s pH regularly, as over-acidifying can harm the plant. Aim for a pH level between 5.2 and 5.5 for the best blue blooms. Additionally, ensure your hydrangeas are well-watered and receive adequate sunlight, as these factors also influence flower color and health.

3. Coffee Grounds for Acid-Loving Plants

Coffee grounds are an excellent addition to the garden, especially for acid-loving plants like azaleas, rhododendrons, and blueberries. They are slightly acidic and rich in nitrogen, making them a great natural fertilizer.
To use coffee grounds, simply sprinkle them around the base of your plants or mix them into the soil. You can also add them to your compost pile to enrich the compost with nitrogen. Be cautious not to overdo it, as too many coffee grounds can create a dense layer that prevents water from penetrating the soil.

Read more

Chicken Cordon Bleu

Ingredients:

For the Chicken Cordon Bleu:
* 4 boneless, skinless chicken breast halves
* 1/2 teaspoon salt
* 1/4 teaspoon freshly ground black pepper
* 6 slices Swiss cheese (or Gruyère, if preferred)
* 4 slices deli ham
* 1/2 cup seasoned bread crumbs
* 1 egg, beaten
* 1 tablespoon butter

For the Sauce:
* 1 can cream of chicken soup
* 1/2 cup sour cream
* 1 tablespoon lemon juice

Garnish Options:
* Chopped fresh parsley
* Lemon wedges
* Chopped chives
* Grated Parmesan
* Microgreens

Read more

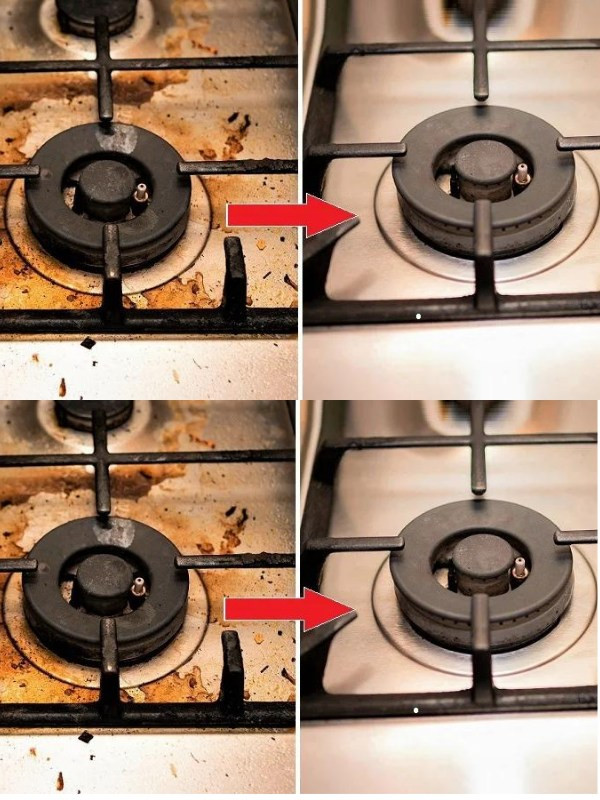
3 homemade tips for removing grease that sticks to the burners in the kitchen

Kitchen burners, also known as pans or burners, are one of the most complicated areas to clean in the home routine and that’s because they usually collect food scraps, oil splashes, and more.

If it’s a nightmare for you to remove the grease stuck to the burners, you don’t need to worry anymore. In today’s article, we are going to give you the best simple and cheap tricks so that you can get rid of it and enjoy a super clean kitchen.

For these tricks, you’ll need ingredients that are easy to find and that you can even have in the comfort of your own home. Keep in mind that these homemade tricks will save you a lot of money and you won’t have to spend a fortune on chemicals that can harm the environment or your health.

1- With baking soda

Baking soda is an excellent ally in cleaning because it disinfects, degreases, neutralizes and bleaches. All of these features will be great for your burners to keep them shiny and ready to go.

What do I need?

  • 1/2 cup baking soda
  • boiling water
  • Spoon
  • Sponge
  • Towel

Step by step:

  1. The first thing you should do is wipe a damp cloth with water to remove any particles or superficial residue left on the burners.
  2. Once you’ve done that, you’ll want to place the baking soda on and around the burners, covering any difficult areas you want to clean with the spoon or, if you like, your hands.
  3. Once you’ve done that, you’ll need to pour boiling water over the entire area
  4. And then you need to leave this mixture of baking soda and water on for at least 30 minutes
  5. After this time has passed, you need to rub with the sponge and remove the water and the remains of the baking soda until there is nothing left. This will remove grease and any residue that may be in it.
  6. Lastly, you can wipe the surface with the damp cloth and your burners will be as clean as possible

Read more

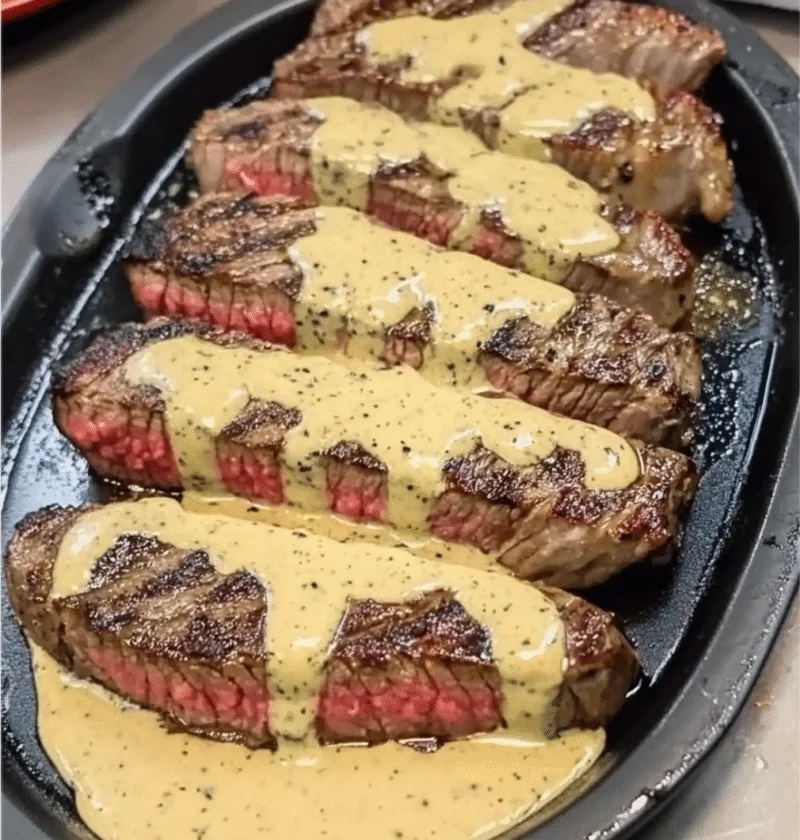
Juicy Steak with Creamy Garlic Sauce

Ingredients

For the Steak:

– 2 thick-cut ribeye steaks

– Salt and black pepper to taste

– Olive oil

– Butter

For the Creamy Garlic Sauce:

– 4 cloves of garlic, minced

– 1 cup heavy cream

– 1/2 cup grated Parmesan cheese

– Fresh parsley, chopped

– Salt and pepper to taste

Now that you have gathered all the necessary ingredients, let’s move on to the steps to prepare Juicy Steak with Creamy Garlic Sauce.

Read more

Honey BBQ Chicken Wings

Indulge your taste buds in a flavor-packed journey with our Honey BBQ Chicken Wings—a culinary delight that marries the smoky allure of barbecue with the sweet embrace of honey. These wings are a celebration of finger-licking goodness, perfect for gatherings, game nights, or any occasion where you crave a dose of savory satisfaction. Join us as we delve into the art of crafting the perfect Honey BBQ glaze and achieving that crispy wing perfection that keeps you coming back for more.

Ingredients:

For the Chicken Wings:

  • 3 pounds chicken wings, split at joints, tips discarded
  • 1 tablespoon olive oil
  • 1 teaspoon garlic powder
  • 1 teaspoon onion powder
  • Salt and black pepper to taste

For the Honey BBQ Glaze:

  • 1 cup barbecue sauce
  • 1/2 cup honey
  • 1/4 cup soy sauce
  • 2 tablespoons ketchup
  • 2 cloves garlic, minced
  • 1 teaspoon smoked paprika
  • 1/2 teaspoon cayenne pepper (adjust to taste)
  • Sesame seeds and chopped green onions for garnish

Read more

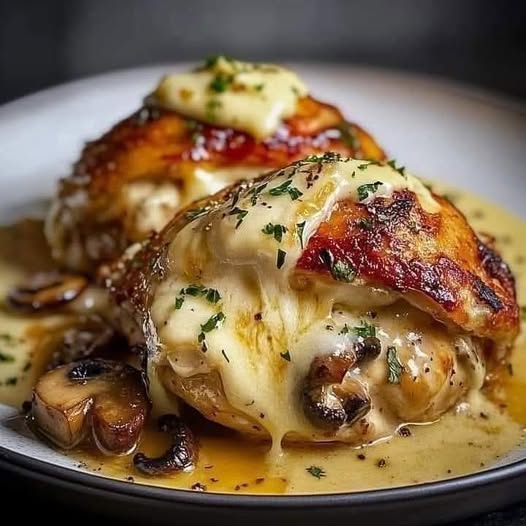
Cheesy Garlic Butter Mushroom Stuffed Chicken

Introduction

Welcome to a delightful culinary journey that combines the richness of cheesy garlic butter mushrooms with the succulence of tender chicken breast in the Cheesy Garlic Butter Mushroom Stuffed Chicken recipe. Imagine the aroma of garlic-infused mushrooms mingling with gooey cheese, all enveloped in juicy chicken, creating a dish that is both comforting and elegant.

This recipe is more than just a meal; it’s an experience that elevates the ordinary chicken dinner into a gourmet delight. Whether you are cooking for a special occasion or craving a cozy homemade meal, this dish is sure to impress your taste buds and those lucky enough to share it with you.

Garlic has long been prized for its robust flavor and various health benefits, while mushrooms bring a unique umami depth to any dish. By combining these ingredients with chicken and cheese, we create a harmonious blend of flavors and textures that will leave you craving more.

Join me as we explore the step-by-step process of creating this indulgent yet simple recipe that promises to become a staple in your culinary repertoire.

Why You’ll Love This Recipe

If you are a fan of recipes that are both indulgent and satisfying, this Cheesy Garlic Butter Mushroom Stuffed Chicken is sure to become a favorite. The best part? It looks and tastes impressive but is surprisingly easy to make, making it perfect for both weeknight dinners and special occasions.

One of the standout features of this dish is its versatility. You can customize the filling with your favorite ingredients or adapt it to suit different dietary preferences. Whether you follow a low-carb, keto, or gluten-free diet, this recipe can easily be modified to accommodate your needs without compromising on flavor.

Furthermore, the combination of protein-packed chicken, earthy mushrooms, and creamy cheese offers a nutritious and balanced meal option. With the added benefit of garlic, known for its immune-boosting properties, this dish not only delights your taste buds but also nourishes your body.

Intrigued by the promise of a mouthwatering meal that ticks all the boxes? Let’s dive into the ingredients you’ll need to bring this recipe to life.

Ingredients

To create this delectable Cheesy Garlic Butter Mushroom Stuffed Chicken, you’ll need the following ingredients:

– Boneless, skinless chicken breasts (4 pieces)
– Garlic cloves, minced (4 cloves)
– Button mushrooms, chopped (2 cups)
– Butter (4 tablespoons)
– Shredded mozzarella cheese (1 cup)
– Grated Parmesan cheese (1/2 cup)
– Fresh parsley, chopped (2 tablespoons)
– Salt and pepper to taste

Optional Ingredient Substitutions:
– Feel free to use any other cheese of your choice, such as cheddar or Gruyère.
– Substitute olive oil for butter for a slightly different flavor profile.
– Add a kick of heat with a sprinkle of red pepper flakes or a dash of paprika.

Read more

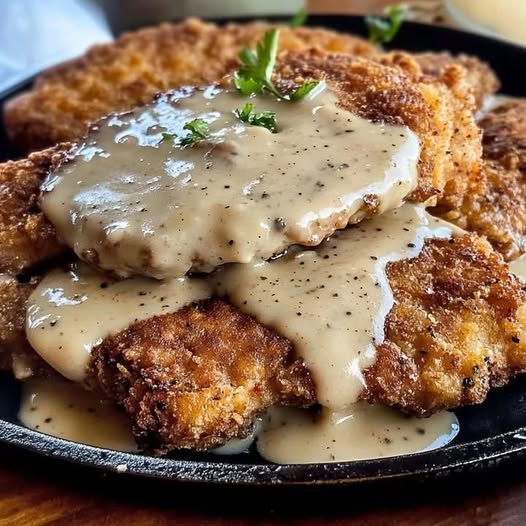
Chicken Fried Steak with Gravy

Introduction

Imagine the comforting aroma of sizzling steak, coated in a crispy golden crust, and smothered in rich, flavorful gravy. Chicken Fried Steak with Gravy is a quintessential Southern dish that brings together the best of both worlds—tender meat and savory sauce. This recipe is not just a meal; it’s a culinary journey that pays homage to hearty, soul-soothing comfort food.

Rooted in the heart of Southern cooking, Chicken Fried Steak with Gravy holds a special place in many homes and restaurants across the United States. The dish’s simple yet magical combination of crispy breading, succulent beef, and creamy gravy has made it a favorite comfort food for generations.

Whether you’re craving a taste of nostalgia or looking to explore the essence of Southern cuisine, this recipe is sure to delight your taste buds and warm your soul. Join me on this flavorful adventure as we dive into the art of making the perfect Chicken Fried Steak with Gravy.

Get ready to roll up your sleeves, gather your ingredients, and embark on a culinary experience that promises to satisfy your cravings and create lasting memories around the dining table.

Why You’ll Love This Recipe

One bite of this Chicken Fried Steak with Gravy, and you’ll understand why it’s a beloved classic. The crispy exterior gives way to tender, juicy steak, while the creamy gravy adds a luxurious touch to each bite. This recipe offers a perfect balance of textures and flavors that will leave you craving more.

Not only is this dish a delight for your taste buds, but it’s also incredibly easy to make. With simple ingredients and straightforward instructions, you can recreate a restaurant-quality meal in the comfort of your own kitchen. Say goodbye to bland dinners and hello to a plate full of deliciousness.

For those watching their diet, this Chicken Fried Steak with Gravy can be customized to suit various preferences. Whether you opt for a lighter gravy or a gluten-free breading, this recipe is versatile enough to accommodate different dietary needs without compromising on taste.

Prepare to be amazed by the magic of this recipe—each bite is a symphony of flavors that will transport you to a Southern kitchen filled with love, laughter, and the aroma of home-cooked goodness.

Ingredients

For the Chicken Fried Steak:

– 4 cube steaks

– 1 cup all-purpose flour

– 1 teaspoon garlic powder

– 1 teaspoon onion powder

– Salt and pepper to taste

– 2 eggs

– 1/2 cup milk

– Vegetable oil for frying

For the Gravy:

– 1/4 cup pan drippings

– 1/4 cup all-purpose flour

– 2 cups milk

– Salt and pepper to taste

– Optional: sliced mushrooms, onions, or herbs for added flavor

Feel free to substitute ingredients based on your preferences or dietary restrictions. You can use almond flour for a gluten-free version or coconut milk for a dairy-free alternative.

Read more

Crispy Cheesy Breadsticks with a Savory Twist

Introduction

Are you looking for a delicious and easy-to-make appetizer or snack? Look no further than crispy cheesy breadsticks with a savory twist. These mouthwatering treats are perfect for parties, game nights, or simply indulging in a flavorful snack. In this recipe, we’ll show you how to create breadsticks that are crispy on the outside, soft on the inside, and bursting with cheesy goodness. Get ready to impress your friends and family with this irresistible recipe!

Why You’ll Love This Recipe

There are several reasons why you’ll fall in love with these crispy cheesy breadsticks:

  • They are incredibly easy to make, even for beginner cooks.
  • The combination of cheese and savory flavors creates a delightful taste experience.
  • These breadsticks are versatile and can be enjoyed as a standalone snack or paired with your favorite dips and sauces.
  • They are a great way to use up leftover bread or baguettes.
  • You can customize the recipe by adding herbs, spices, or even different types of cheese.

Ingredients

To make these crispy cheesy breadsticks, you’ll need the following ingredients:

  • 1 baguette or Italian loaf
  • 2 cups shredded mozzarella cheese
  • 1/4 cup grated Parmesan cheese
  • 3 tablespoons olive oil
  • 2 cloves garlic, minced
  • 1 teaspoon dried oregano
  • 1/2 teaspoon salt
  • 1/4 teaspoon black pepper
  • Optional: 1/2 teaspoon red pepper flakes for a spicy kick

Read more

Breakfast Grilled Cheese with Eggs

Introduction

Imagine waking up to the delightful aroma of sizzling cheese and eggs, perfectly grilled to golden perfection. A breakfast grilled cheese with eggs is not just a meal; it’s a culinary experience that combines the comforting goodness of a classic grilled cheese with the richness of eggs. This recipe blends the familiar with the extraordinary, offering a savory twist to your morning routine.

What makes this breakfast grilled cheese with eggs so special is its versatility and simplicity. It caters to both cheese enthusiasts and egg lovers, satisfying your cravings for a hearty and indulgent breakfast. Whether you enjoy a leisurely morning or need a quick yet satisfying meal on the go, this recipe has you covered.

This delectable dish also holds cultural significance, resonating with the tradition of hearty breakfasts that fuel you for the day ahead. The marriage of cheese and eggs in this recipe pays homage to the timeless appeal of comfort foods that bring warmth and satisfaction to every bite.

Join me on a culinary journey as we explore the art of crafting the perfect breakfast grilled cheese with eggs, blending flavors and textures to create a memorable breakfast experience.

Why You’ll Love This Recipe

Indulge in the best of both worlds with this breakfast grilled cheese with eggs, where gooey melted cheese meets fluffy scrambled eggs in a harmonious union of flavors. This recipe offers the following irresistible features:

The ease of preparation makes this dish ideal for busy mornings when you need a quick yet substantial breakfast option.

The combination of cheese and eggs provides a protein-packed meal that keeps you full and satisfied for hours.

Customize your breakfast grilled cheese with eggs to suit your dietary preferences, whether you opt for a vegetarian version or add your favorite vegetables for extra freshness.

Experience the joy of biting into a crispy, golden-brown exterior that gives way to a creamy and cheesy interior, creating a delightful contrast of textures.

Ingredients

Prepare to embark on a flavorful journey by gathering the following ingredients for your breakfast grilled cheese with eggs:

• Slices of bread (choose your favorite type, such as sourdough or whole wheat)

• Eggs (fresh and preferably organic)

• Cheese (cheddar, Swiss, or any melting cheese of your choice)

• Butter

• Salt and pepper to taste

Optional ingredient substitutions:

• Use plant-based butter for a vegan-friendly version of this recipe

• Substitute dairy cheese with vegan cheese for a dairy-free alternative

• Experiment with different bread varieties, such as rye or gluten-free options, to suit your preferences

Read more